


Most mountain bikers have heard of pump tracks. Many have ridden one at their local bike park. With the right skills, you can fly around these dirt rollercoasters with ease. But did you realize that those same skills are immensely valuable on nearly any trail?
Pumping the trail on your mountain bike makes riding so much more fun! More specifically:
1. You minimize or erase impacts from hitting the fronts of bumps.
2. You generate speed on the backs of bumps.
3. You flow through bigger and nastier bumps, and it feels smooth and easy.
4. All of your riding feels better. Looking for awesome things you want to pump is more satisfying (and safer) than watching out for bad things that you want to avoid.
5. The pumping movement forms the foundation for more advanced moves including pump-manualing, hopping, jumping, technical climbing, and advanced cornering. The best riders will pump almost everything on the trail. If you want to get great at riding, get great at pumping.
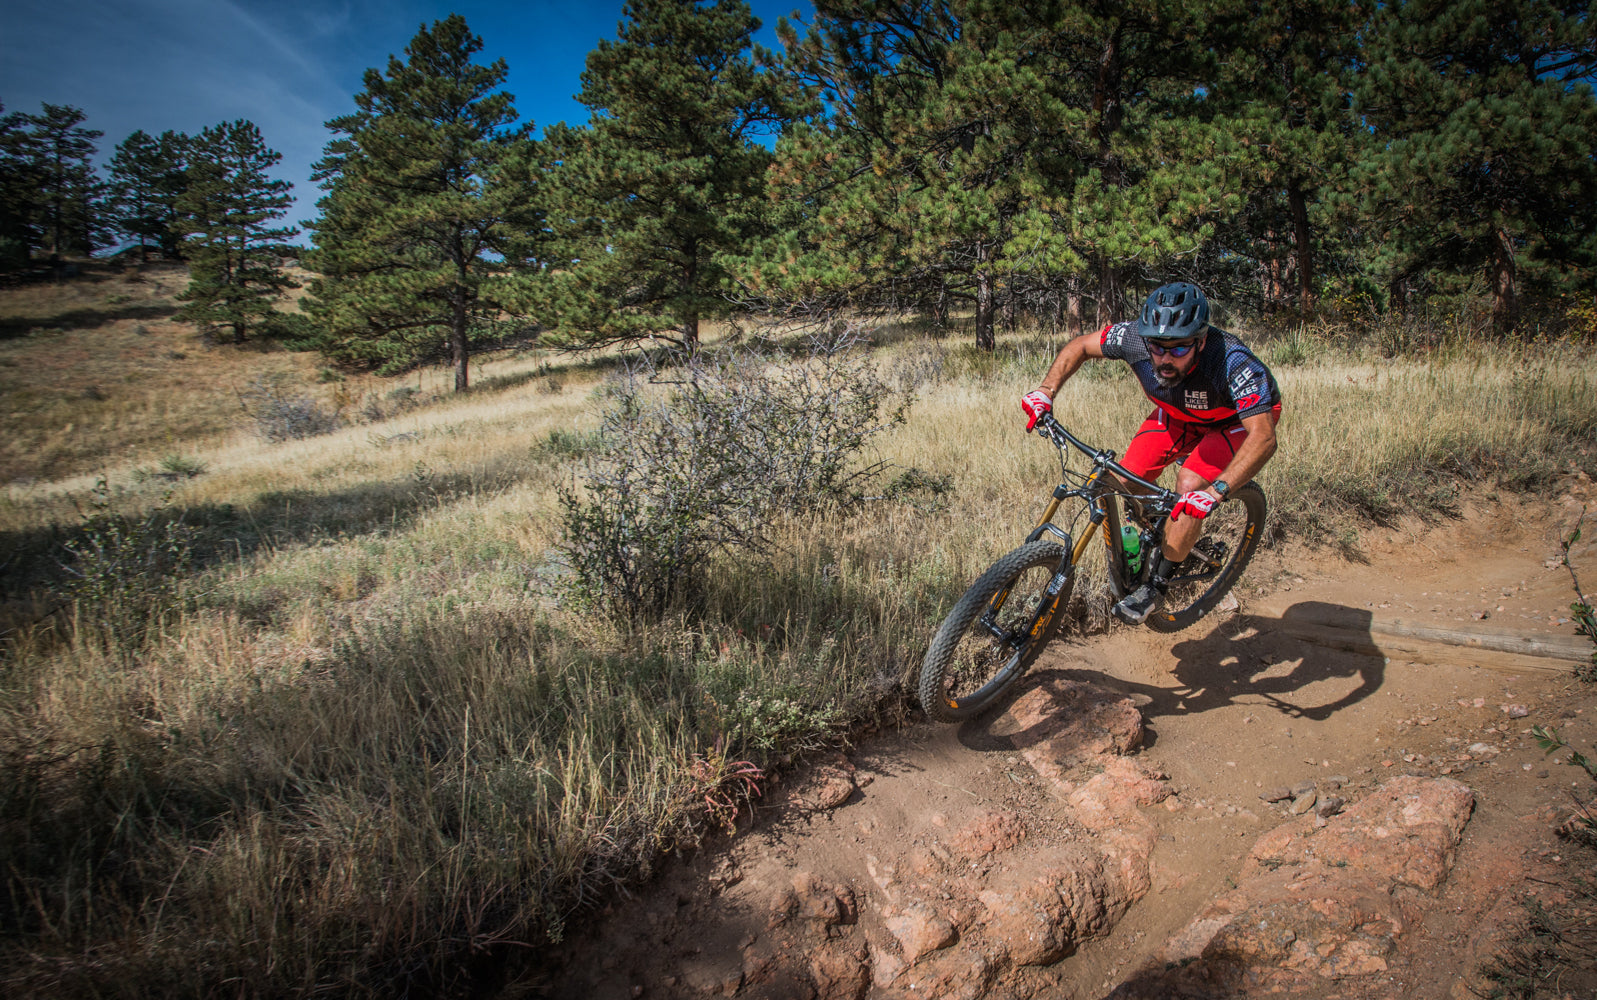 Pumping makes all trails smoother. | Photo by YannPhotoVideo.
When I teach people how to pump, I often use this progression:
Pumping step 1: Arms
To start, you should always...
1. Balance on your feet and...
2. Actively match the angle of your bike to the angle of the ground.
When you create the proper bike angle, you stay safely balanced in the middle of the bike. Then if you push and pull powerfully with your arms, you can generate pumping power. This method keeps you safe, increases control, and helps you ride faster on crazier terrain.
Next, imagine any terrain as a wave.
A set of rollers on a pump track or a BMX track is the most obvious example. Those dirt humps look like an actual sine wave.
But this can be applied to everything. Trails aren't perfectly flat. Rock gardens, log piles, and other bumps might look random, but try to see past the details and perceive the overall wave shapes they create. The more adept you become at pumping these features, the more you’ll perceive what I call "Sine Waves of Love" where others can only see scary gnar.
Here's another angle. Rather than thinking about rollers and trail features as just ups and downs, let’s think about them as a wave with troughs and crests.
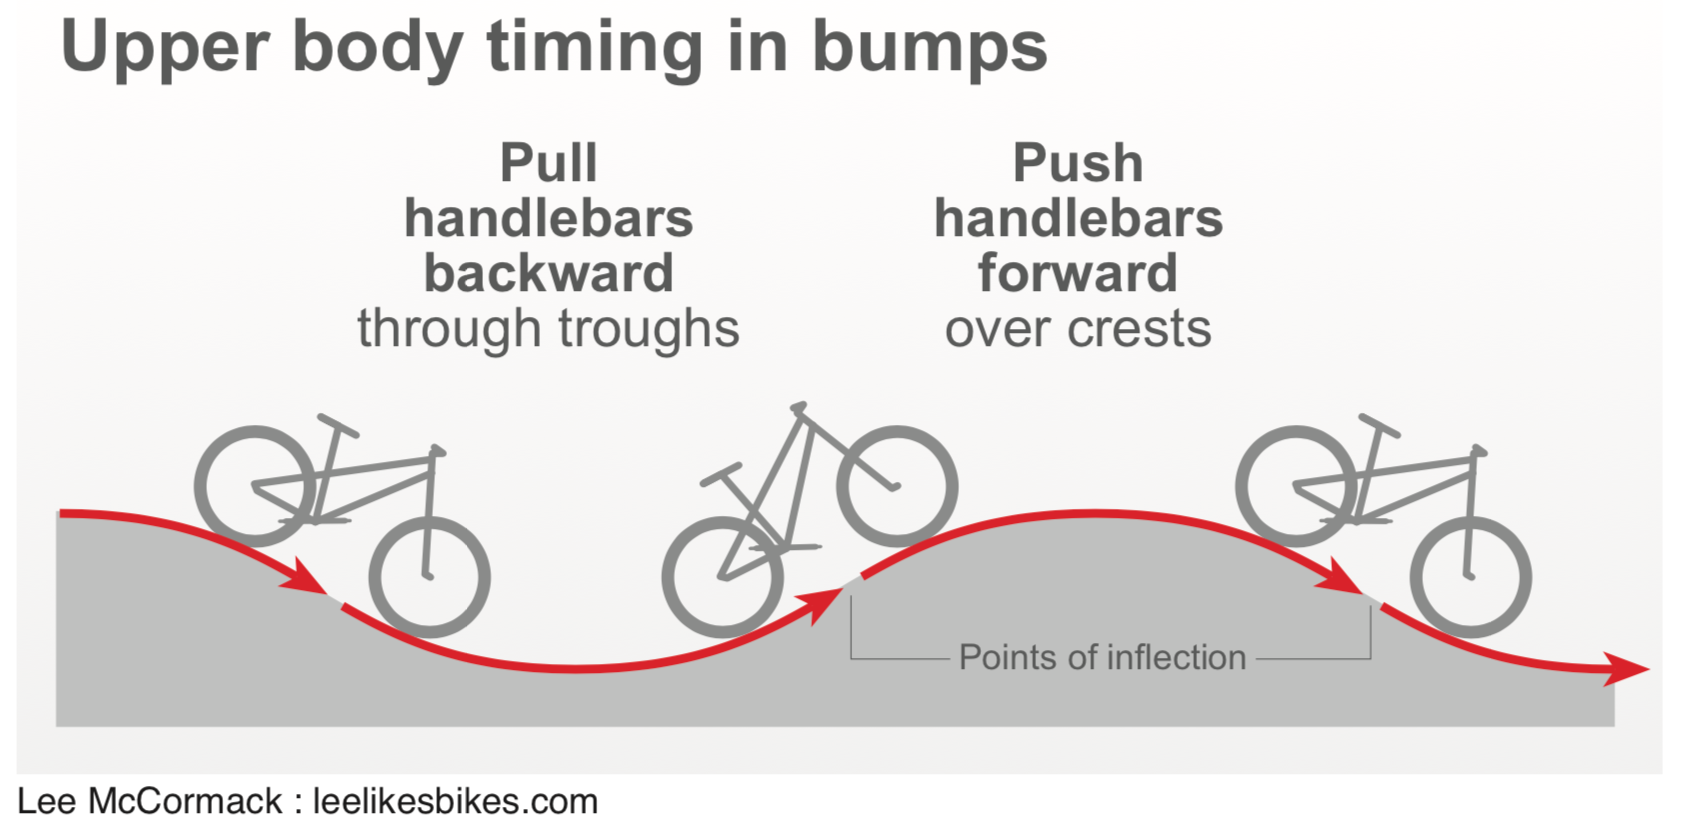 When your bike is rolling through a trough, the bars rotate and move backward, toward you.
When your bike is rolling across a crest, the bars rotate and move forward, away from you.
The point where a wave stops bending upward and starts bending downward is called the “inflection point.” There’s another inflection point, of course, when the wave switches from bending downward to upward.
If you want to ride with ultimate power and smoothness, start pulling or pushing at the inflection points. In other words, start pulling right when the wave starts to become a trough and start pushing when the wave starts to become a crest.
The timing of the inflection points might be much earlier than you’re used to. And it will take practice! But the increased speed and control are profound.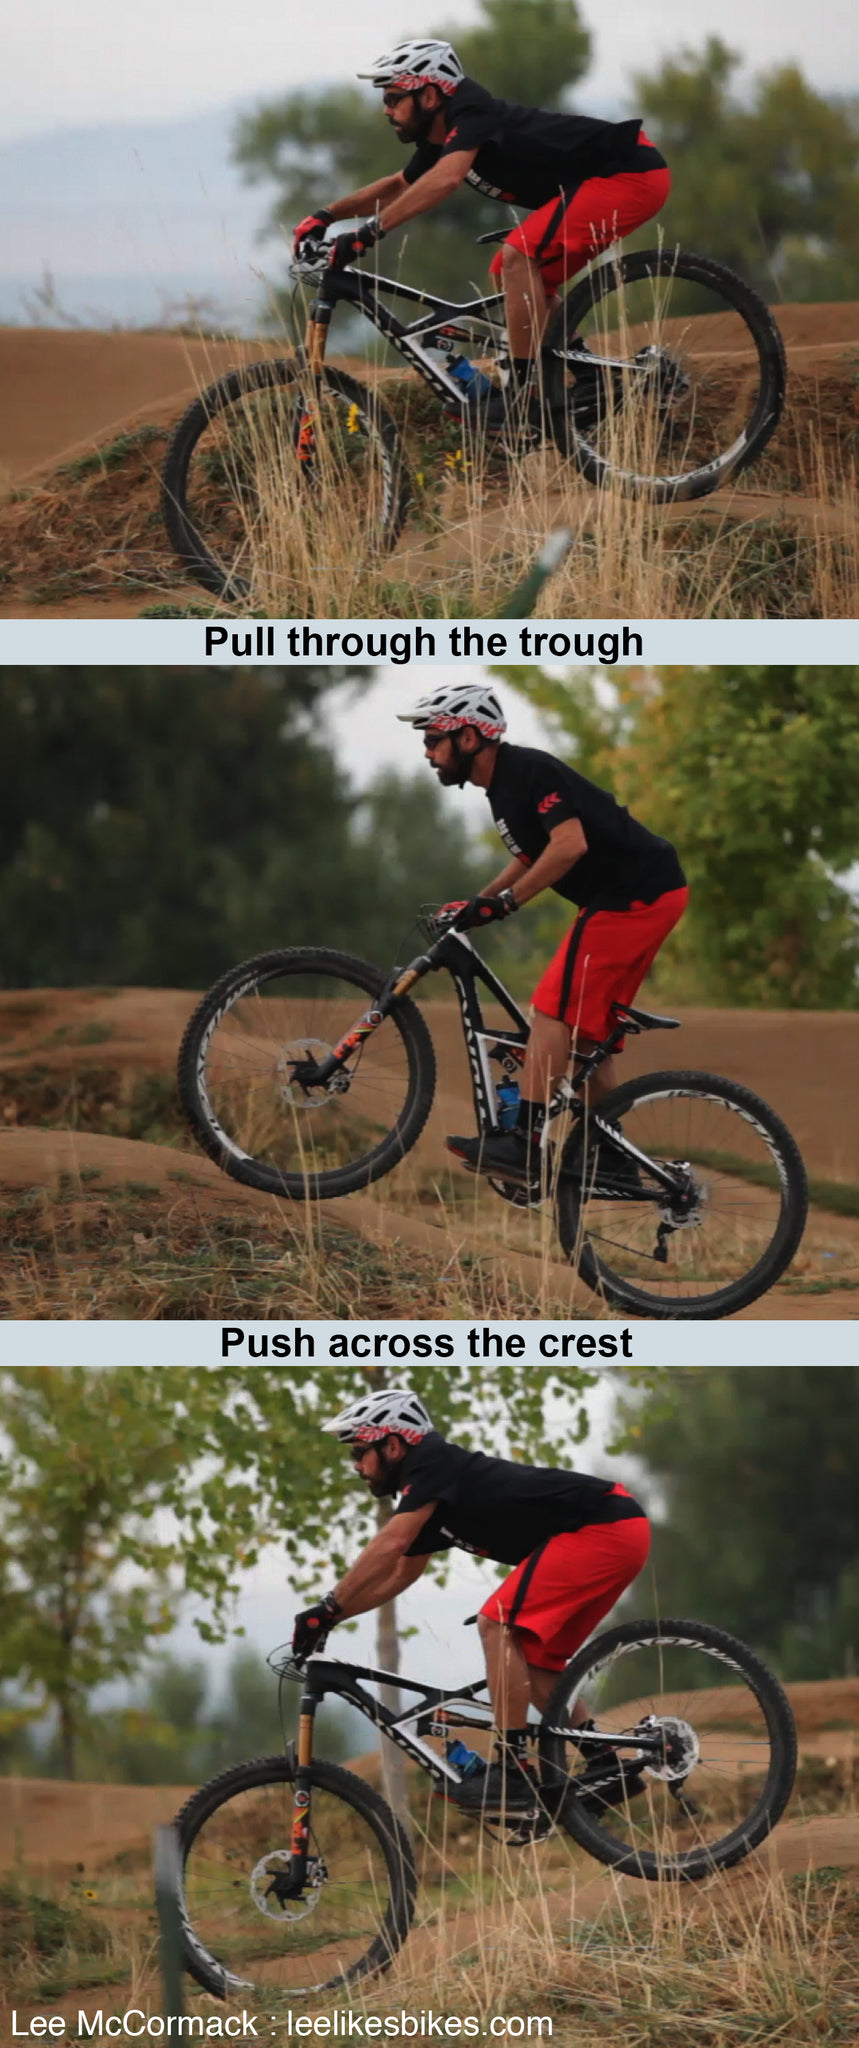
Pumping step 2: Legs
While your arms manage the angle of your bike to keep you balanced on your feet (and off your face!), your legs manage height and pressure, and they generate most of your pumping power. So let’s get those legs (mostly your hips) working.
Warning: For most people, the hips are a black box of mystery. In my experience, very few riders can drive from their hips without a lot of focused effort. Be patient. Be kind to yourself.
If you’ve skied moguls well, do the same thing with your legs.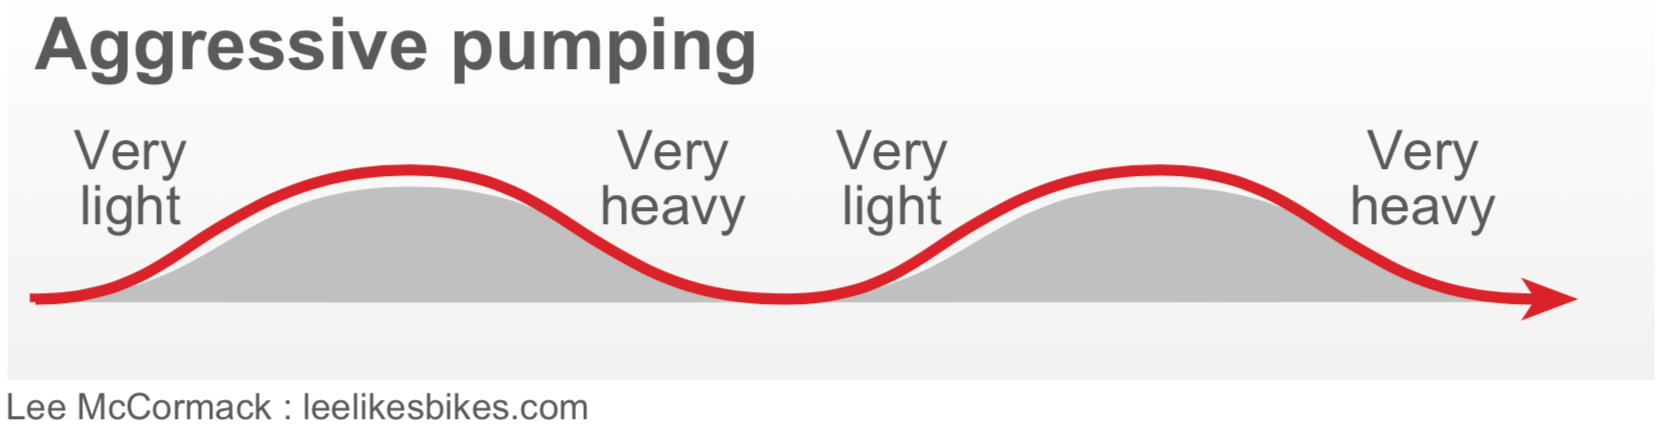
Practice the skill of pumping with your legs on a set of smooth rollers. Enter at moderate speed in your ready position. As you work your way through the rollers, keep these notions in mind:
In the bottom of each trough, stand as tall as you can. This gives you the range to absorb the next frontside. You should never lock your legs straight, but you should get very close. You’re strongest when you’re closest to full extension, so extend!
At the top of each crest, crouch as low as you can. This gives you the range to push down the next backside.
Push your legs down the backsides. Do this hard.
Pull your legs up the frontsides. Don’t actually pull your pedals. Let the bike rise while you let your feet move upward.
Your arms will move too, but for now, focus your intention on your legs. Let the arms follow.
Your head should stay still while your legs move with the track.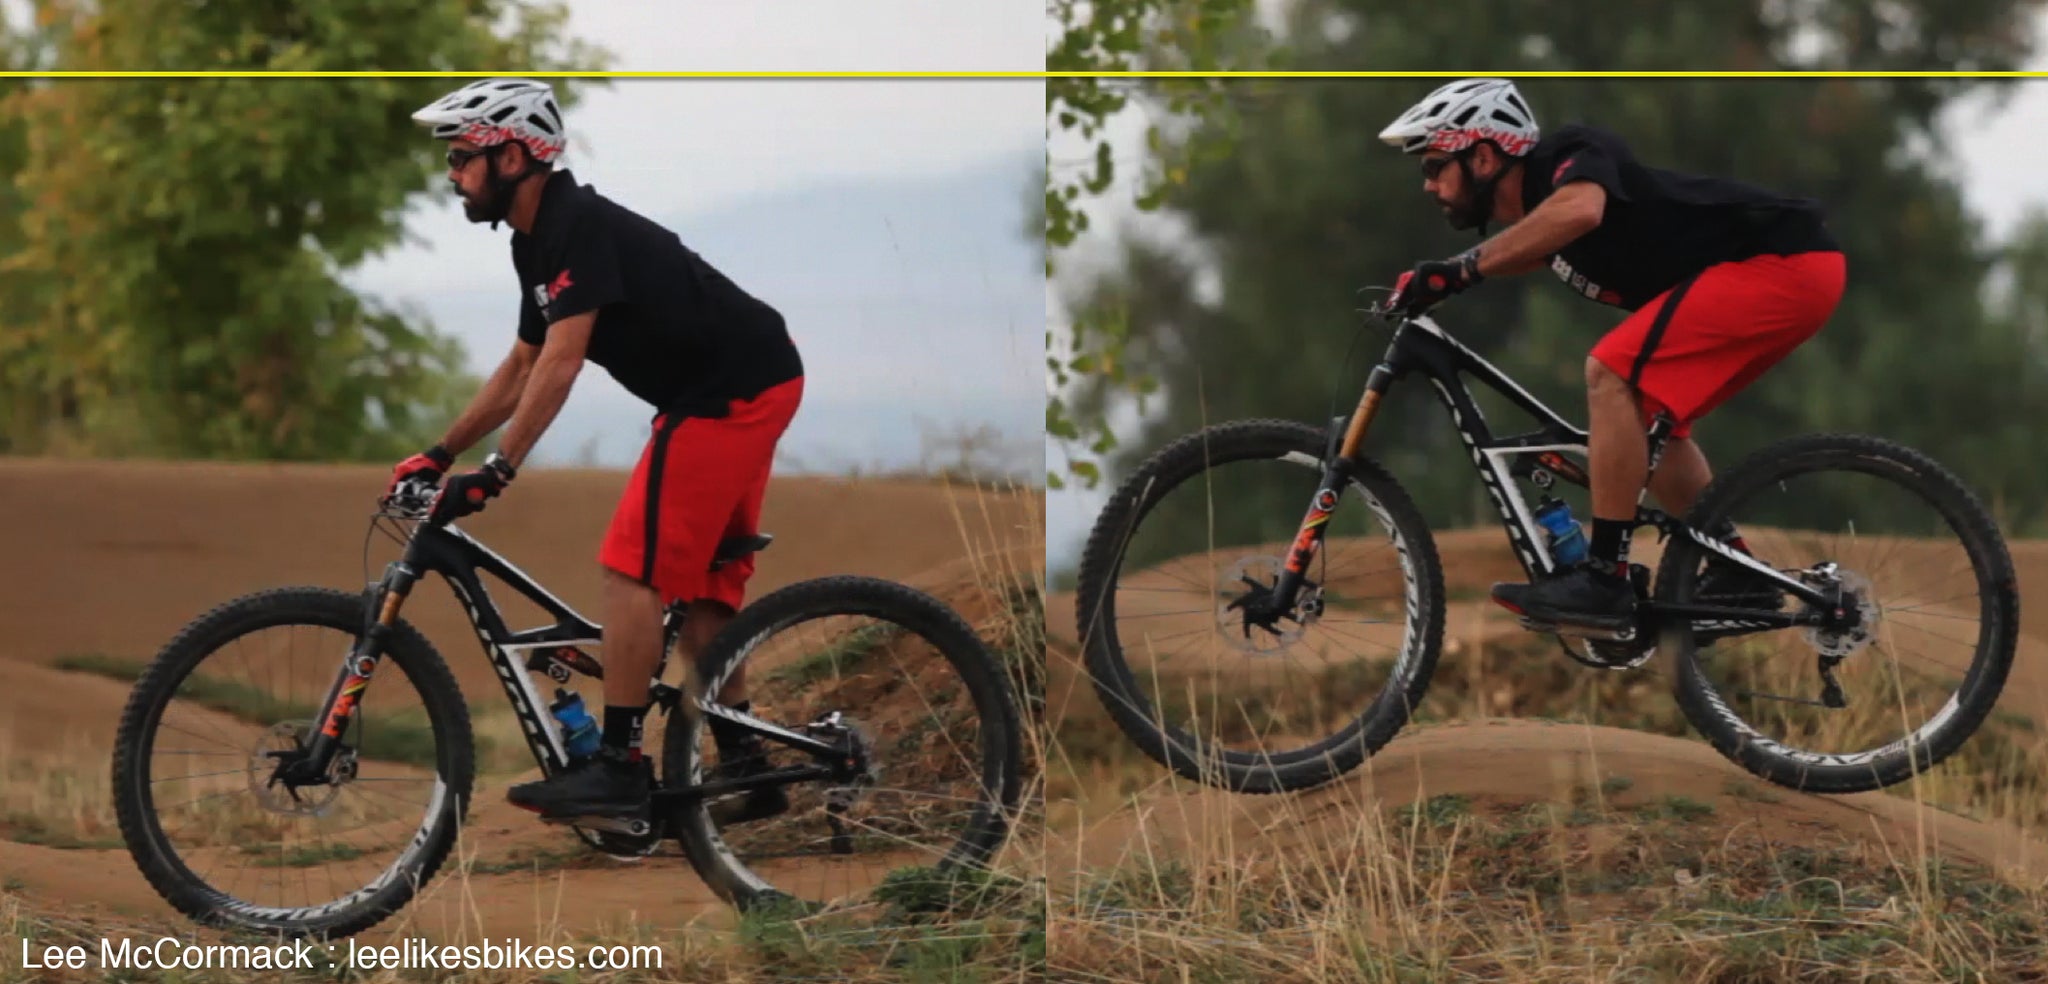
Make it a cycle. The heavier you push into a backside, the lighter the bike will be on the frontside. As you get better and faster, imaging weightlessly skimming over the frontsides — and eventually hopping from one backside to the next.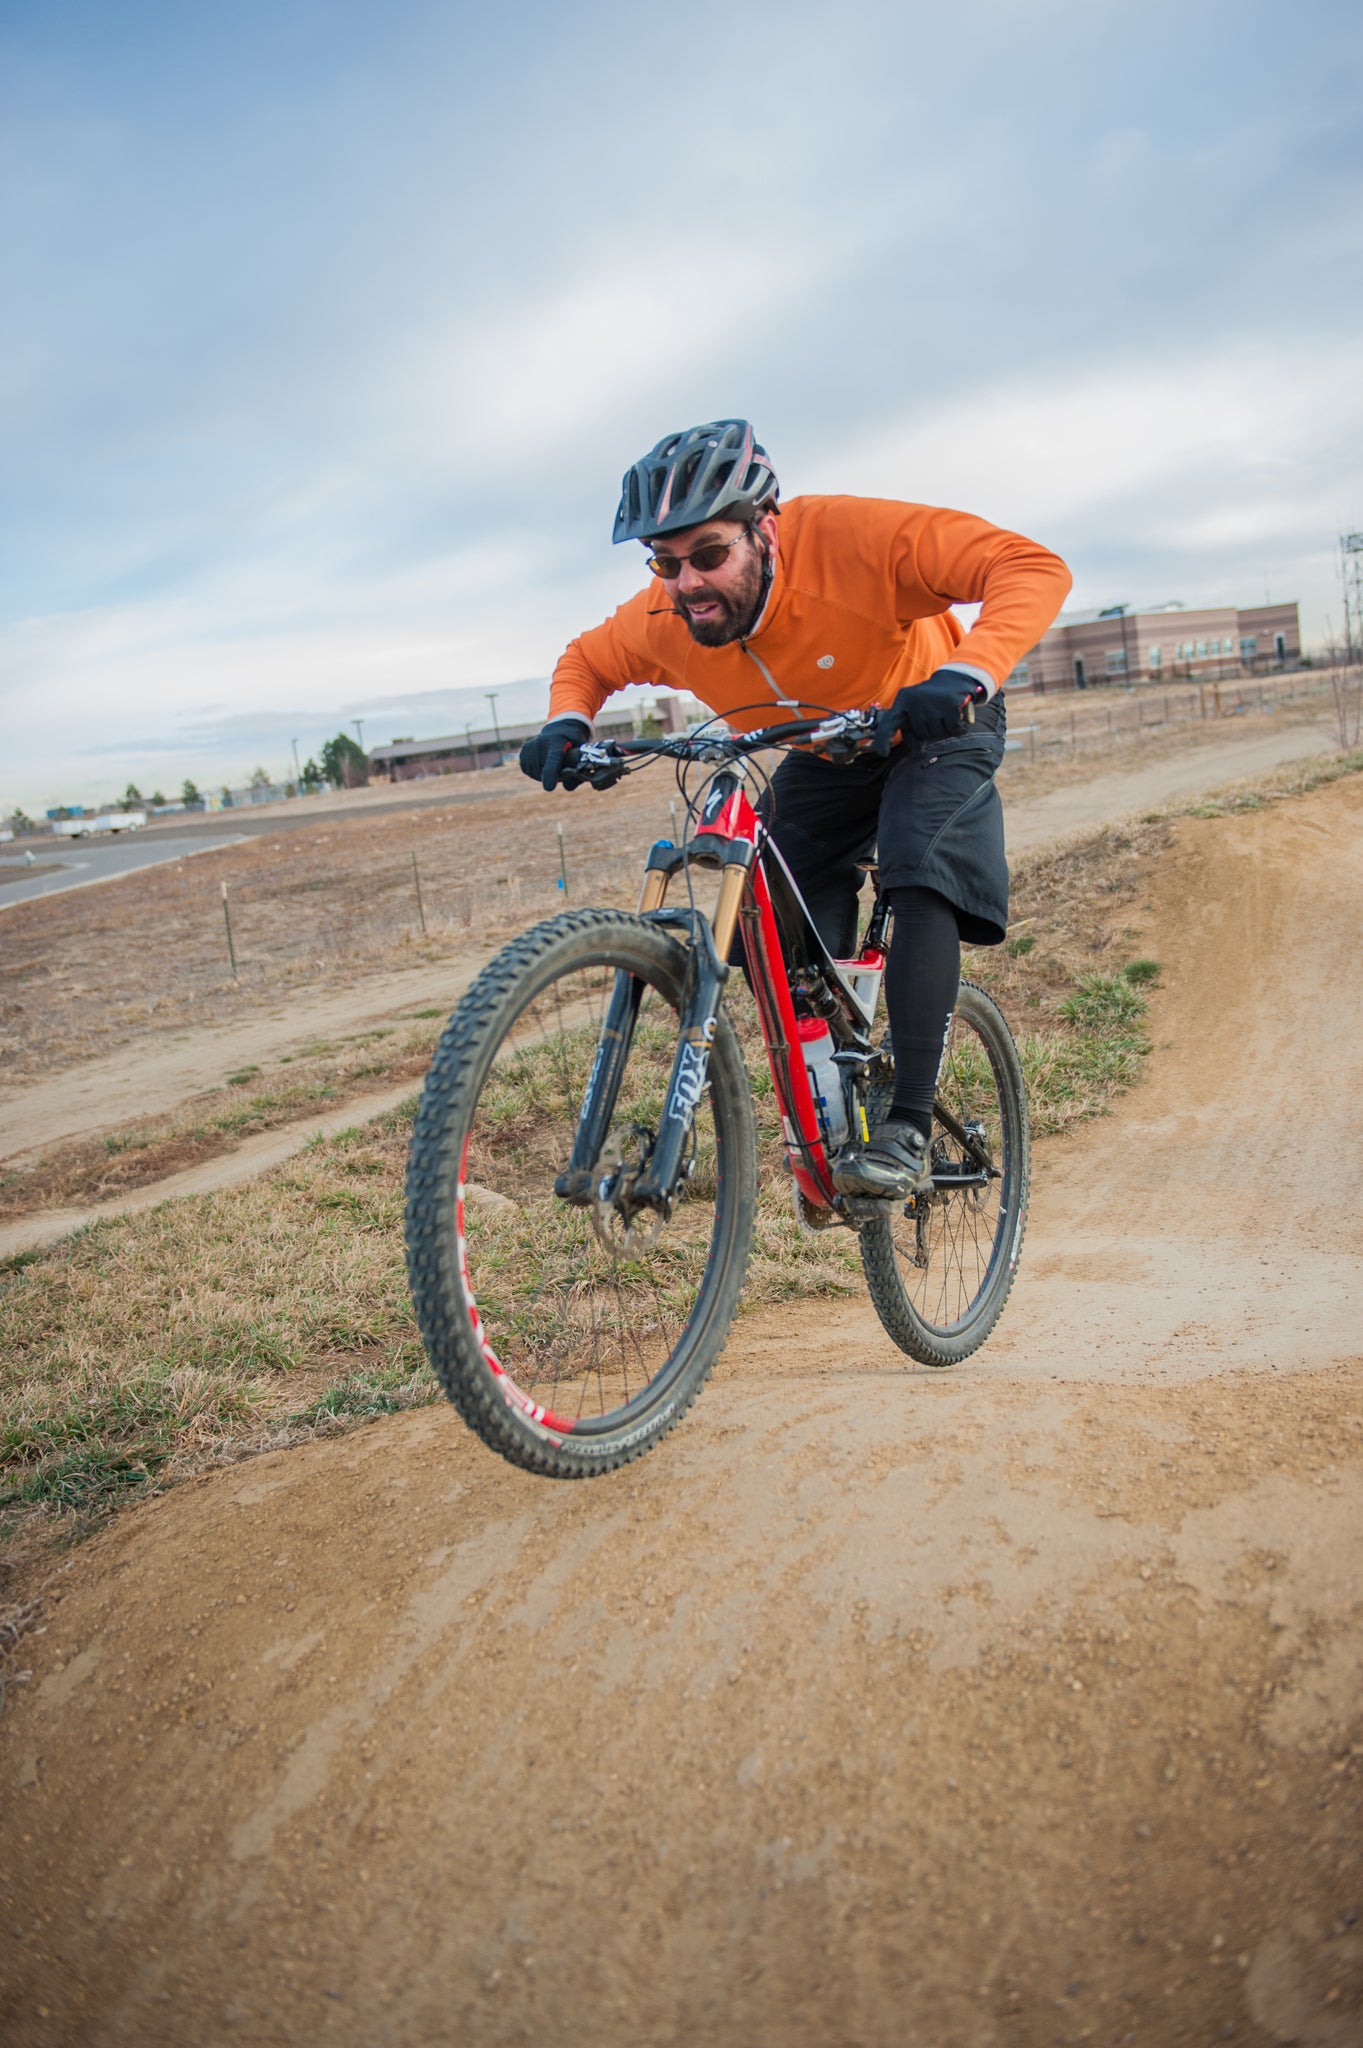
Note the floating tires. If you get heavy enough on the backside, you’re weightless on the frontside. | Photo by YannPhotoVideo.
This is a safe and efficient trail-riding style. As long as the terrain is smooth, you can drive all power from your core and legs while you let your hands track with the trail.
When you’ve mastered using your upper and lower body, you’re ready to combine them.
Pumping step 3: Arms and legs
So far we’ve focused on making loving angles with your arms and angry violence with your legs. That’s a great start.
As you’ve probably noticed, your arms and legs are moving at the same time. If you can allow your arms and legs to do their jobs independently, that’s good — but we want to be better than good.
Our ultimate goal: Unite your arm and leg movements through your core to create one integrated motion. This is where your true pumping power comes out, and it’s the key to riding at the highest level.
From now on:
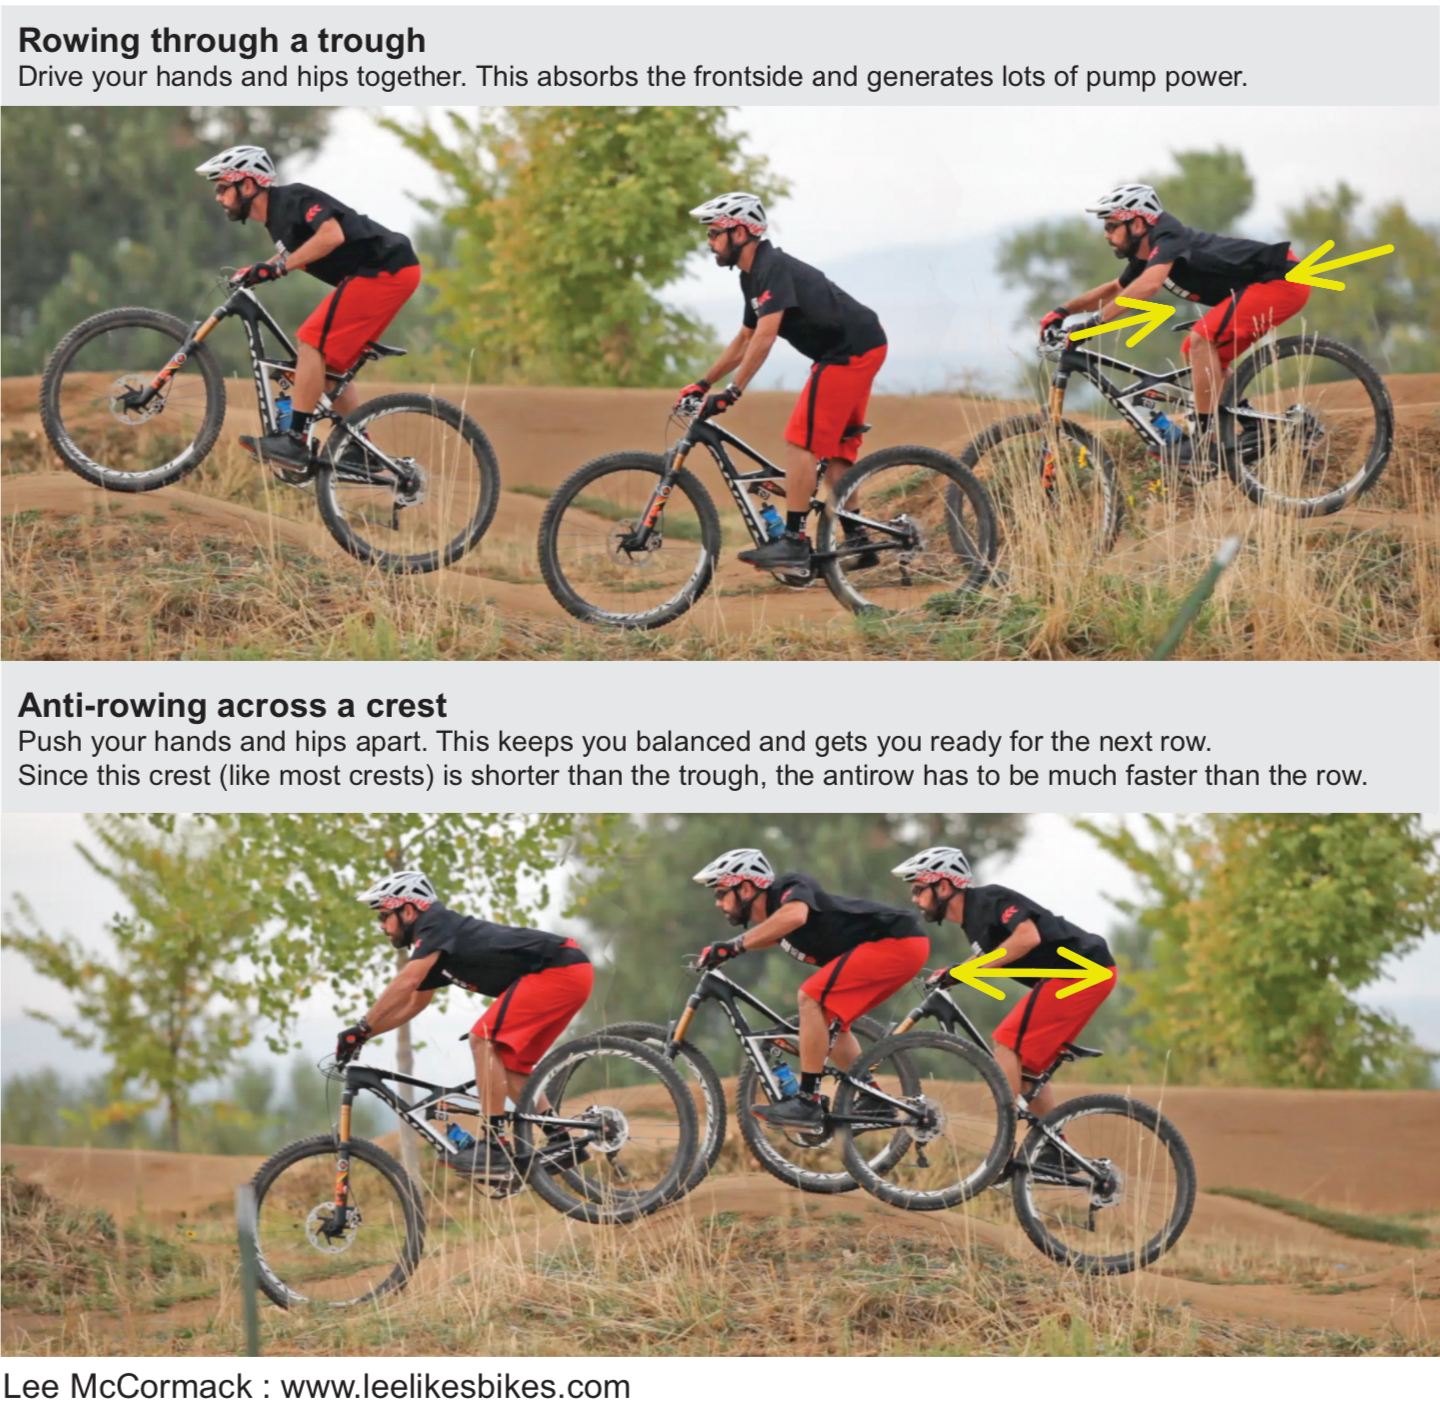
1. In all troughs: Your hands pull back while your legs push down.
We call this rowing, and it’s the power phase.
Pull with your arms while you push with your legs. The more you unite those motions, the more power you’ll have.
While you pull back with your arms, the leverage of your frame drives about double that force into your rear wheel. When you add a massive push from your hips, you can drive hundreds of pounds of force into your rear wheel.
When riding through the troughs and crests of a wave, what happens after something’s very heavy? It’s very light! Perfect for pumping, hopping, jumping, technical climbing, and more.
2. On all crests: Your arms push forward while your legs pull up.
We call this anti-rowing, and it’s the recovery phase.
Drive your hands and hips apart. Push your arms forward while you drive (hinge) your hips backward. This pushes your front wheel across the crest while bringing the bike closer to you, which makes the rear wheel extra light and gives you more range to pull your feet up even farther. When you do this well, it feels easy and perfect.
As you pass the steepest part of the backside, your hands and hips are farthest apart, and you’re loaded for another row phase.
3. Ellipses of Love
When you row and anti-row in cycle with the bumps, your hands and feet follow elliptical paths. This is the ultimate in smoothness — and a hallmark of a great rider.
Check out this video:
Keep practicing. Pump everything you can — bumps, rocks, and log piles. The better you get at pumping, the faster, smoother, and more powerfully you can ride. And don’t forget: This fundamental movement pattern forms the base for advanced skills including manualing, hopping, jumping, wheelie dropping, and technical climbing.
Have fun out there!
Lee McCormack is a world-renowned mountain bike skills author and instructor who's worked with thousands of riders of all styles and levels. You can learn way more from his books, online school, and classes. Check them out at www.leelikesbikes.com.
Read Lee's other MTB skills posts:
Three tips to corner better on your MTB
Three tips to brake better on your MTB
Seven keys to a grat MTB body position


